Used instruments: white balance setting.
Objects of research: a white sheet of paper.
Task: to adjust the white balance by hand.
NOTE. Tutorial does not contain the information on all the possibilities of the application. Here the optimal way of solving the task set is offered.
Launch the Altami Studio (or Altami VideoKit). For launching the application use the Altami Studio sortcut at the workbench or the menu item Start→Programs→Altami Ltd→Altami Studio 3.0. Besides, the application can be launched from a folder into which it was installed (usually it is C:\Program Files\Altami Ltd\Altami Studio 3.0\).
In order to connect camera use the menu item File→Connect device (picture 1).
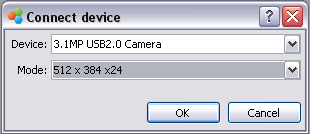
Picture 1. Connecting device
In the device list of the Device menu find the model of the connected camera and in the Mode point find the play mode.
Click OK. After that you can connect camera.
Place under the microscope an object which is considered white. For example, you can use a sheet of white paper.
Reset camera settings. Set the parameter values as it is shown below:
RGB: 128
Brightness: 1
Saturation: 127
Gamma: 20
Shutter: max (parameter responsible for lightness)
Gain: 1
Frames Exposure: 0 (parameter responsible for lightness)
Bits: High (parameter responsible for lightness)
By lightness setting of the microscope move the histogram into the center as it is shown in the picture 3.(a и b, c и d).
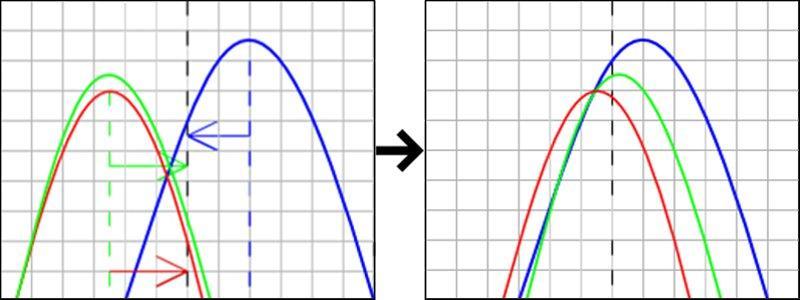
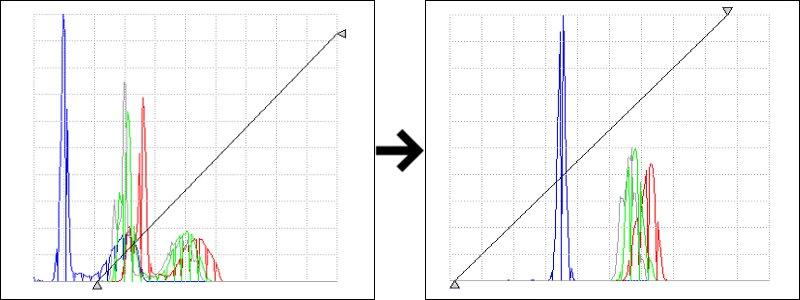
Picture 3. Histogram
By sliders R, G и B reach the situation when the peaks of the respective components are aligned in the histogram center as it is shown at picture 4. (a и b, c и d).
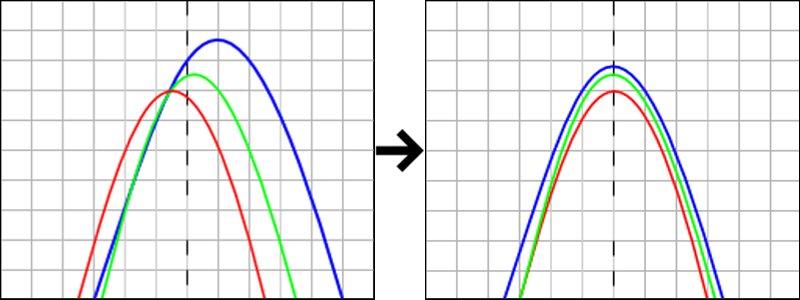
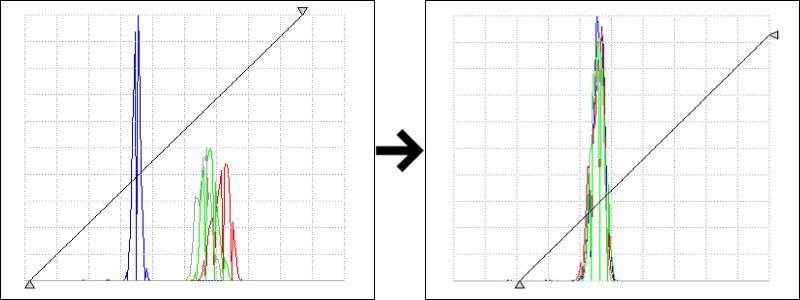
Picture 4. Histogram
Correct the lighting with the microscope.
Remove from under the microscope a white item and direct camera at the examined object. Proceed to work.
Altami software products work under the most popular modern operating system such as Windows, Linux и Macintosh.
If our products do not solve your problems, we are ready to develop "from scratch" or modify existing applications.
Tired of the slow camera work? Keep up with progress! The camera on USB 3.0! operates at a speed of up to 180 fps.